Detail

I’ve just been updating the slides for the last week of the Photography Classes and I thought I’d share.  Last night’s class covered digital images and the whole mega-pixel-mega-shmixel thing: does a larger image mean more detail?

Well no.  Having a higher resolution sensor gives the opportunity to capture more detail but only:

  • If the sensor sites are independent of each other
  • Your lens can resolve an image to the precision of the size of each sensor site
  • There is detail in the image you are trying to resolve.

And then  you have to ask yourself if you need that much detail.  Does it help tell your story?  Is it, in fact, distracting?

Anyway, with some data we generated on the course last week, an interesting comparison is now available:

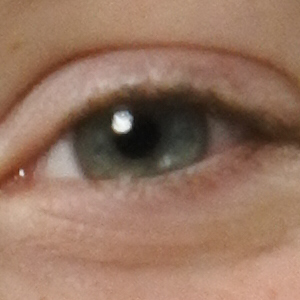
Camera on the Motorola G5 Phone: 13.1MP
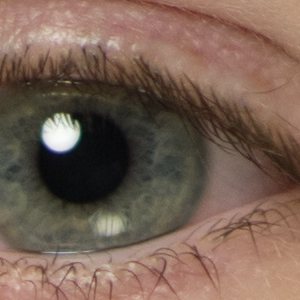
Nikon One J5 10-30mm Kit Lens. 20 MP
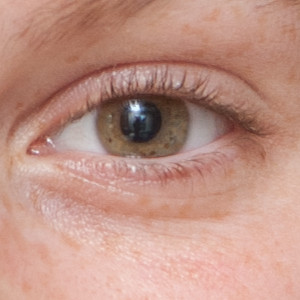
Nikon D850, 85f1.4. 45 MP

So there are a number of variables at work here: the sensor resolution, the lens (and settings) and even the crop – these are all 300×300 100% crops but the variation in size of sensor makes the crop different in each case.  And I would expect the phone in particular to do a little better in brighter lighting.

But the trend is clear and the point is just that putting a 13MP sensor on my phone doesn’t make it a great camera.

I particular in this case compare these to the 12MP of the D700:

D700 105f2.8, 12MP

This last example has least actual resolution of any of the examples here but much more actual detail compared to the smaller sensors and the crappier lenses.

But also remember that having a great camera doesn’t automatically make you a great photographer.

New Tech

Technology posts are pretty rare on the blog.  Deep down there is a camera geek somewhere and we all love a new toy.  But having to make a living as a photographer forces you to examine every potential new purchase and decide whether a new toy is going to earn it’s crust.

And as anyone who’s been on my evening class will tell you.  The camera is just a tool to get a good image.

But after a long, faithful and very reliable service, my trusty Nikon D700 bodies are starting to show their age.

Camera technology has moved on considerably but most of the new additions, although impressive, weren’t anything my clients were going to pay for.

But the time has come to move on.  After much ummming, ahhing, googling and agonising, I am the proud owner of a Nikon D850.

What I got that I wanted:

  • Faster, more accurate autofocus (including reliable 3D tracking).  Which for me means a tangible decrease in the number of good images that need to be rejected because they are a little soft.  Which is great when shooting wobbly kids with blurry backgrounds.
  • More dynamic range.  So already it seems a lot easier to pull back very bright and very dark areas in the images.  So shooting in difficult lighting situations gets easier.  Again, more keepers in more locations.
  • More image resolution.  Which means more options for cropping in post production.  As much as you try to get it right in camera, at times a crop is stronger.  But if you want a decent print of a crop, you need more data.
  • A newer, stronger, more weather resistant camera body.  Much less chance of it failing when I need it to perform.

But as well as the cost of upgrading, there are other implications:

  • More  image = more storage required.  Realistically I don’t generally need all that extra image but that’s what I now have.  Now my workflow needs to cope with much larger files.  Putting a session of images on a single DVD for backup isn’t going to work anymore.
  • More data = slower processing.  So the camera upgrade came on the back of a PC upgrade but even then those big files need a little longer to load in all their glory.
  • Software upgrade.  OK I’m a bit lazy/stingy with my software upgrades (but at least I pay for my software).  But new RAW files need up to date software.
  • Lens upgrades.  All of my lenses are compatible.  The higher resolution sensor pushes them to the limits of their ability to resolve an image.  Now I still don’t need all that detail and most of my lenses have actually performed pretty well (despite the web telling me they wouldn’t).  But the 50mm lenses were always a little ‘weak’ (I have 4 different versions) even though they take lovely images.  I might need to upgrade here.
  • New fingers.  After 10 years of using identical cameras, I need to learn some new tricks to get the settings I need.
  • New cards & batteries – just more stuff to buy (and have spares)
  • New L-bracket.  I love the L Brackets for my tripod but each is fitted to the specific camera body so I need a new one.

And some other stuff:

  • Features I don’t (yet) need – and may or may not ever get around to using.  Like video (4K no less) and time lapse.  Very cool but no idea if I’ll ever use it.
  • Different colours.  I think I like them better.  Until I do some more printing I’m not sure.

It’ll get it’s first commercial outing this week.  My clients won’t really notice but my life will hopefully be easier.  And the D700 will be in the bag just in case…

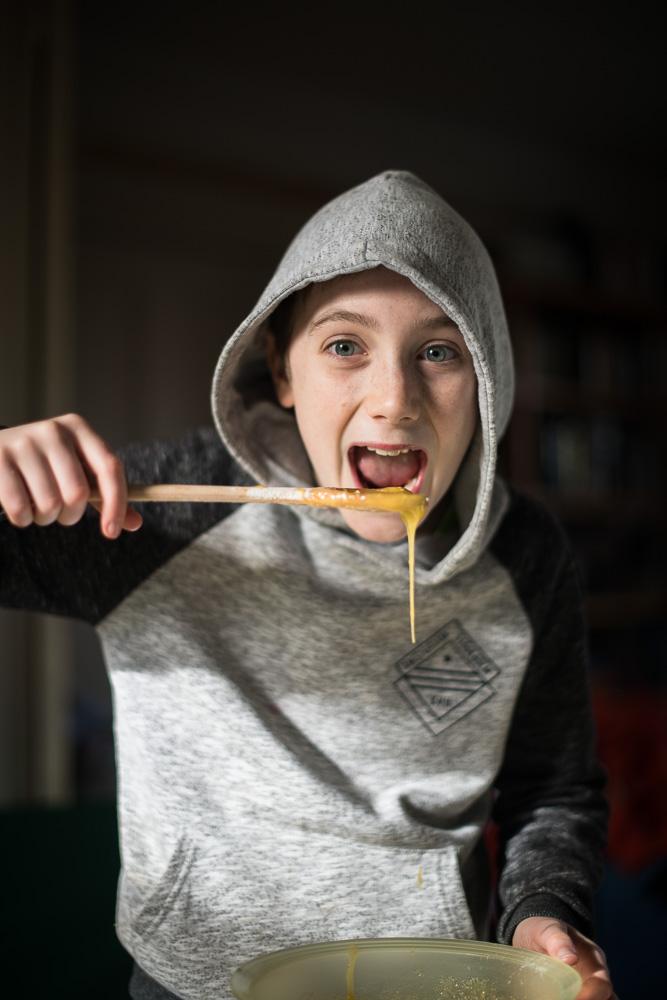
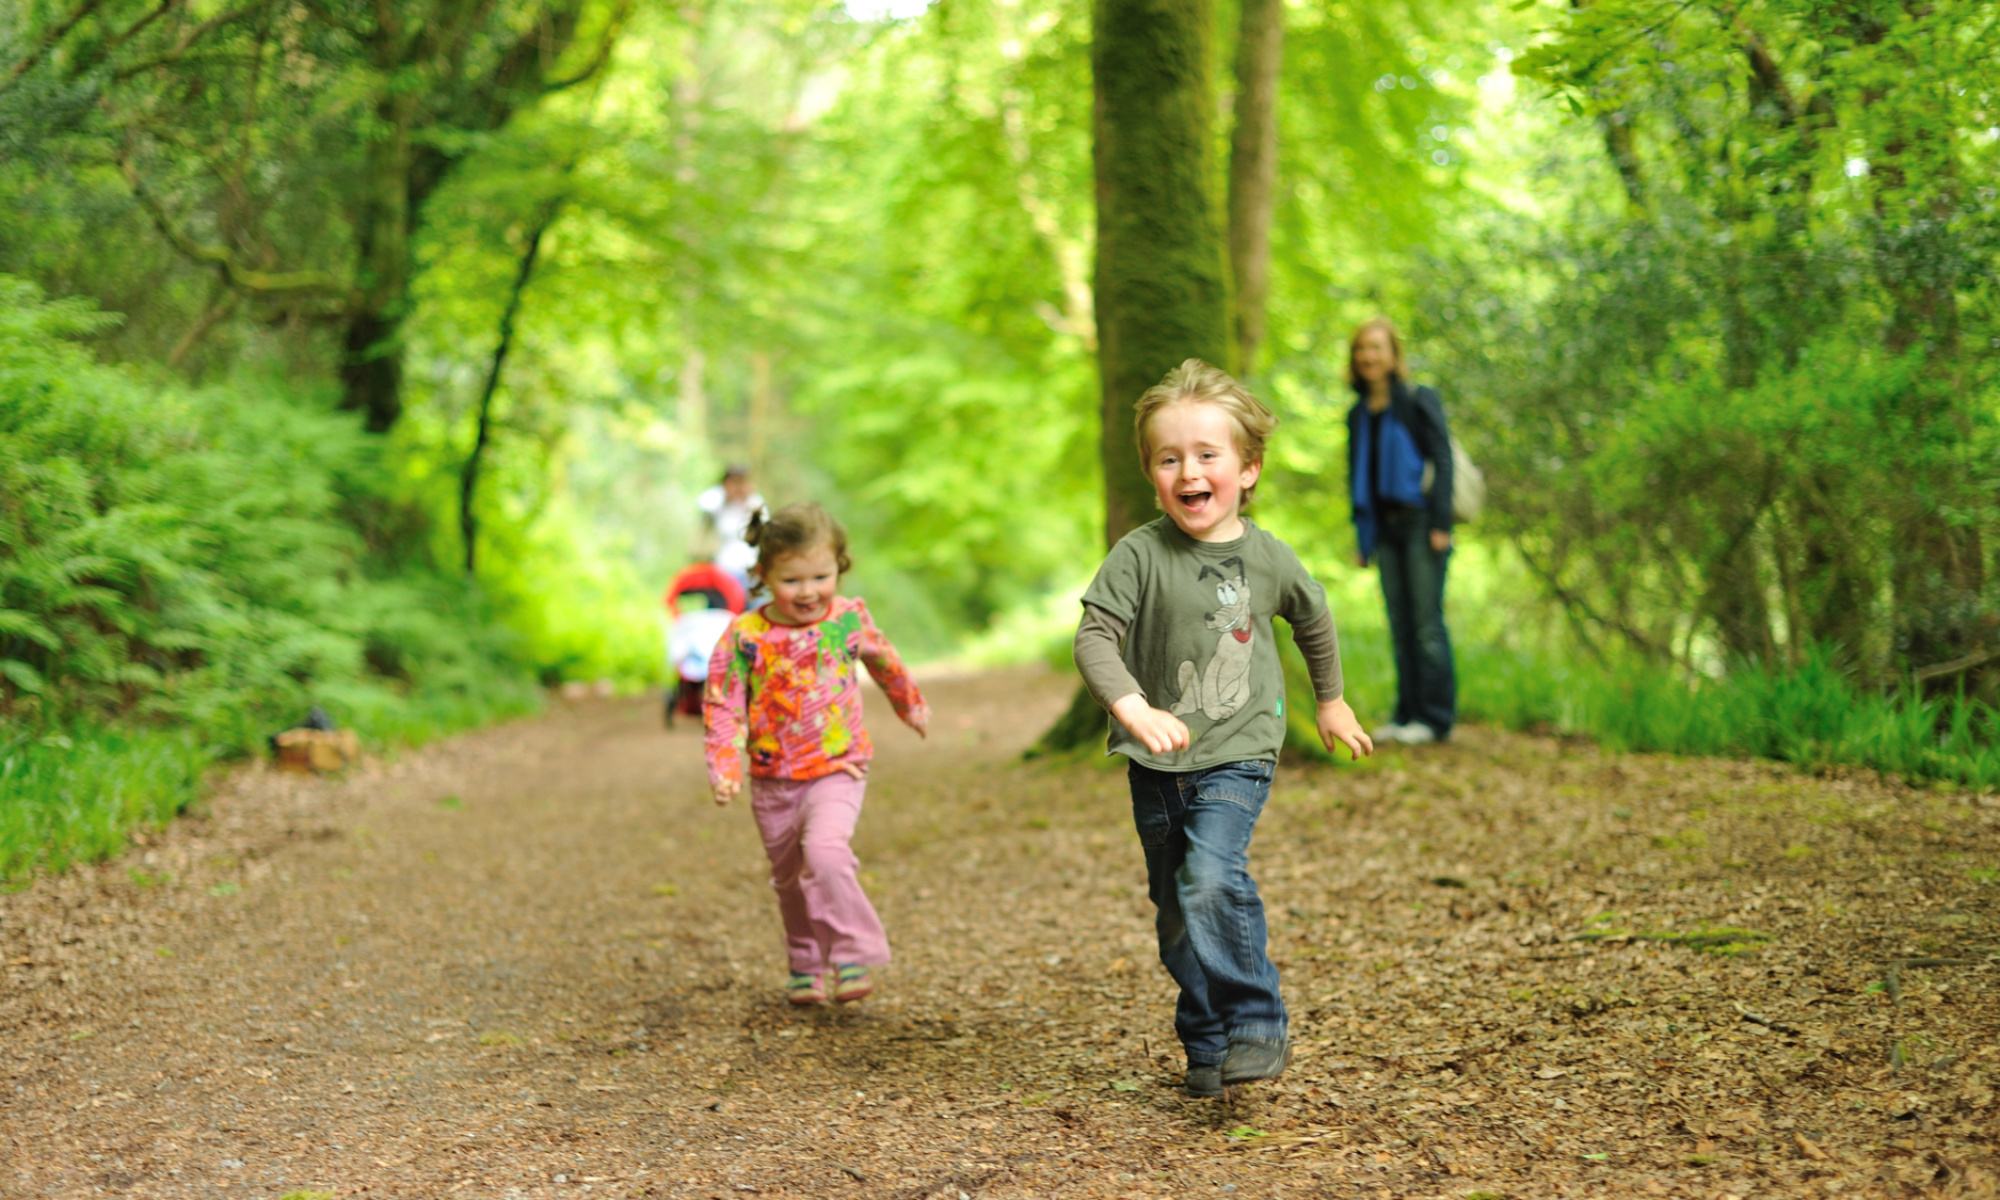
Better tracking of active kids. Better pulling back of highlights.

Special Selfie

A few strands came together yesterday:

After ripping my oldest white paper background in half on-site on Wednesday, I needed to check out a couple of studio paper backgrounds that I’d been given by another photographer.

So I hoisted the stand and unrolled them to see what they were like.

First off, after you got through the inevitable dirty bit at the bottom, the white one was actually in better shape than my old one (and much more there).  Result.

Then there was a black one.  Never used black.  It’s a little bent but most of it is good.

I wanted to see how the black would look.  There’s no one around to model it.  We’ll do a self portrait then.

Cue the second thread: I’ve been thinking about a self-portrait for a while.  Wondering how I’d like to photograph myself.  It is a very challenging task for a number of reasons:

  1. No one really likes pictures of themselves.  No one normal anyway
  2. I do this a lot for other people.  I know too much.
  3. I know lots of ways to take a portrait and have considered the whys and wherefores of each option.
  4. I know how small things change the way we read a face in a still image.  I know the work I put in to get that right in other people.
  5. I think way too much about this kind of thing.
  6. With all of the above, I expect to be judged by my own self-portrait (maybe I’m actually judging myself)

So all in all, it’s just not happening.

I’ve had a few ideas but not really progressed them.

Moreover I’ve enjoyed looking (and secretly mocking) other photographers’ attempts to do their own job on themselves.  Mysteriously, the majority seem to involve hiding behind a camera: “I’m a photographer, I must have a camera in my image”.  It seems to be some kind of rule.  And some photographers love rules.

Buy Why?  Does the camera define you?  Why do you hide?  When you look at the profile images on LinkedIn, why so only the photographers include their tools?  You don’t see dentists holding drills.  It’s rare even to see musicians holding instruments – and those that do don’t hide behind them.  So what’s the story?  Is it a secret code?  Some even hold them like they are some kind of weapon!

To me it demonstrates a woeful lack of comprehension of exactly what it is a profile image does.  From the people who should know the most – but maybe it’s just me that thinks about this stuff.  Maybe the other guys just take the photo.

But the arrival of the black background and 15 minutes spare finally started me off.

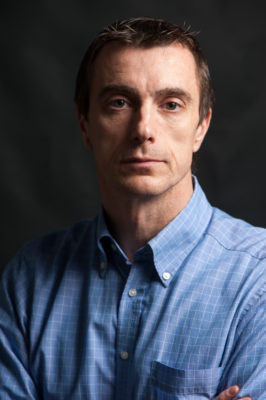
Perhaps it’s the complete randomness that got me started:  I never shoot on black; I hardly ever use studio light.  I’d imagined my self-portrait to be completely typical of my best work (soft natural light, shallow focus, blurred contextual background, engaged expression) and this was the exact opposite.

Of course the wasn’t much time and the wireless remote release wouldn’t work (again) so it’s just a very simple start with a plan for future iterations (which is very me): black background, one light, prime lens, self timer.   I only took a couple and some were out of focus (because of the self-timer thing).

And I need a hair cut.

But it’s not bad – considering the subject matter.

rjc_1307-edit-1000px

Incentives (Draft 2)

I knew this would be a difficult subject to address.  Draft 1 kinda turned into a rant so it’s consigned to the WordPress ‘permanent draft’ folder.

So let’s start again.

My objective for all my family photo sessions is that everyone enjoys it.  It’s simple really: if we can make sure that the whole experience is a very positive one then the photos will reflect that.  As much as possible is done to make that happen – choosing a good location, timing etc – and from the moment we meet it should be obvious that this isn’t something that anyone needs to get stressed about: we’re just going to go out into the Park and take some photos.

I find that kids react to their environment.  If everyone is cool and easy-going they’ll relax and be themselves.  They’ll start playing and I’ll be able to watch them, encourage them, they’ll start to trust me and take some really lovely pictures of them.

It’s easy to go in to a photo session with expectations of how it’ll be.  In reality you might not have done this before. I think some parents worry that they might not get the images they expect.  Remember that all my work is shot with ‘normal’ people.  The pics on the web site are kids just like yours.

I’ve done this before.  You’re in good hands. I understand that kids need some time to get used to me, the camera and having their photos taken.  They need time to feel comfortable, reassurance that they’re not going to get into trouble for doing or not doing something so they can relax and play.

So don’t panic.  Relax and enjoy your kids and let me handle the photos. Don’t ask the kids to ‘smile’ or ‘be good’ because those terms mean nothing in the context of the photo session.

It’s not uncommon before or during a session for some parents to get so worried that their kids won’t ‘smile’ or ‘be good’ that they offer a reward for doing just that.  I have found that overall that’s not helpful – mostly because it’s too easy to get wrong.  Kids can become so focussed on the reward that it upsets the session.

Equally they can be so unmoved by the reward that they are impervious to it’s charms and parents are tempted to escalate the incentive (or even turn to punishments).  In this case we’re now fighting and the chance of pictures of a relaxed kid smiling are reduced.

I’ll try to illustrate:

Dad: Now you be good for the man
Kid: ????
Dad: Smile now
Kid pulls weird grin
Dad: Not that smile, your real smile
Kids weird grin just gets weirder
Dad: If you give me a big, real smile I’ll give you a treat
Kid just tries harder at the really big weird grin
Dad: No, that’s not it
Kid is now upset because they failed and won’t get the treat
Dad: Just smile for Daddy
A cycle of weird grins, Dad gets frusrated, Kids gets sadder cos Dad’s not happy. Eventually Dad notices Kid is sad and gives the treat to make it better.  Kid thinks he did good and it’s all over.  Until:

Dad: so where’s my smile?
Round we go again – Kid not sure what he did last time for the treat so goes through grinning-crying routine again.

But we still don’t have a photo.

Now these are hypothetical.  In reality, most Dads are Messers at heart (for their own kids at least) and when they realise they you’re giving them the best excuse ever to just kick back and enjoy their family we get what we came for.

So, in summary:

  1. Relax
  2. Treat the session as just a normal thing to do
  3. Don’t offer incentives or negative repercussions for behaviour
  4. You can reward once we’re done but don’t mention it during the session
  5. If your kids aren’t smiling then say or do something that will make them smile or laugh (just make sure I’m ready to photograph the reaction)
  6. Follow my lead for helping me get a good reaction from them

Eddies in the Space-Time Continuum

Excuse the Hitchhikers reference but on Friday I got a real last minute request to help capture an office fit-out.

A lot of work was planned for the weekend and they were thinking a timelapse would be cool.  But the carpet was going in in an hour or so.

I’ve done a few of these but nothing for three days long.  Theoretically once you solve power and storage issues then it should be OK – as long as you get the Maths right.  So I grabbed everything and we went for it.  But you never quite know with these things and there’s no way to check it as you go (and no way to do it again if there’s a problem).

It turned out really well, no unforseen problems.  This is the first cut of the timelapse.  I edited it down a bit more and adjusted some of the colouring for the client but it is pretty cool…

Ask Yourself Why?

If you want to photograph a man spinning, give some thought to why he spins. Understanding for a photographer is as important as the equipment he uses. – Margaret Bourke-White

I found this quote while clearing out some stuff on a drive.  I captured it ages ago and meant to blog it (apologies if I did that already somewhere).

The file is dated 2009.  If there’s one thing that’s consistently struck home about photography in the last 6 years it’s summed up in this quote.

Shooting Nana Part 4: An Old Friend

Finally I got my last roll of 35mm Ilford HP5 Black and White film back and scanned it in.  It had to be hand processed by someone in Kinsale (I still have the wherewithall to do it myself at home but buying a batch of chemicals for one film wouldn’t have been worth it).

I called this post ‘an old friend’ but in fact there are two here:

  • I was always a fan of HP5 in the old days.  I had a collection of cheap, slow consumer zoom lenses so 400 ASA film was handy.  I also shot a lot of college sports in dark gym-halls (esp Basketball) so I used to push it up to 3200 ASA on occassion and it coped admirably – even sitting under the net with a 28f2.8 lens you needed 3200 ASA to get a decent shutter speed.
  • I loaded it into the Nikon F4e.  Still one of my favourite Nikons just for the pleasure of handling it: the weight, the simplicity of the UI, the sound of that shutter and film advance.  This was the camera that really got me taking pictures again after a long absence.  I bought it from the US on eBay and then set out equipping it with all its bits and pieces (batter grips / screens / lovely old lenses)

Enough of the gooey-eyed retro-tech love.  How did they get on?

Well, er, the pictures are different.  Not really worse or better but just different. I suppose I’m mainly comparing it it the 35mm Full Frame Digital of the D700: same format, same lenses.

  • Slightly Shotgun. So rarely in the old days would I have spent a whole film on one subject so there is some duplication and waste here (oh, the sound of that motor drive).  But no-where near as much as the digital equivalent.  So the restriction of 24 exposures (as it happens) has made the process slower and more delibrate but not as much as the ‘blad did.  But it’s also not as spontaneous as the digital.  There are some keepers but not as many as the digital version.  The important distinction here for me is the absolute number of keepers at the end.  So although the percentage is lower with digital it results in more keepers and better chance of getting something genuinely spontaneous in the mix.
  • Grain – bags of it. No doubt about it, film is different.  The grain of the higher speed film is obvious although in this case not undesirable or inappropriate.  The grain here is nice I think.  It appears the old F4e was pretty sweet in terms of focus – in reality I suspect that the grain is hiding focus inacuracies which again isn’t a bad thing.  While shallow depth of field is nice, it only serves to contentrate the viewer on the subject.  Obvious softness in focus in key areas is distracting.  All that pixel-peeping-crtical-focus stuff isn’t really helpful for portrait work (and I’m only shooting at 12MP).
  • It Feels Right.  The digital guys spend a lot of effort trying to get nice contrasty black and white with smooth tones from an image captured digitally in colour.  I sometimes find it hard to get there with certain images and there are lots of magazine articles, plug-ins and on-line debates about the best way to do it.  You can’t beat the original.  Lovely contrasty tone with excellent dynamic range straight out of the little box / can.
  • Endless Crap.  This whole film experiment has reminded me of one thing though that I’ve had to do with out for so long: all that crap on your negatives.  OK so film processing might not be what it was but my memory of dealing with most labs was a significant amount of damage coming back on my negs on a significant number of occassions.  Maybe I just didn’t every find a lab good enough.  Going digital was the first time I truely controlled the whole workflow from start to end – from capture to print – and finally it started to produce results I was 100% happy with.  For someone as fussy as me this is a biggie.

Overall though I like these and although time-consuming and a little pricy it’s been a pleasure so shoot some black and white film again.  The analogue process is very tactile even without the actual printing of black and white prints.  What comes out has it’s own beauty but I’m not convinced it’ll ever come back into my professional workflow.  I want to shoot some more though – and to find the right subject to suit the medium.

I’d love to do black and white printing again (I’d love to have the time even more!)

What has this whole process taught me?  That’s another post…

Shooting Nana Part 3: Old School

I have the 120 film back from the lab now.

A big part of this experiment was to spend more time with the Hasselblad 500c and it lovely 150f4 lens.

There is a tendancy to look fondly back at the days of Medium Format.  For many people it was purely about the quality of the images produced.  The combination of a much larger image area and expensive lenses that effectively resolved much more detail in your image.

In the digital era, Medium Format seemed to become more synonomous with the highest resolution cameras – to the extent that the latest generation of 35mm DSLRs claimed to be ‘Medium Format’ because they offered resolutions only formerly available with a larger image area.

A lot of that is nonsense.  We’re back to the uber-tech and ignoring some old school photography stuff.

Shooting Medium Format changes the way your images look for a number of different reasons:

  • In order to fill the larger image area, you need a longer focal length.  There’s definitely a very different feel to these from being shot on a 150mm compared to an 85mm (35mm Full Frame) or a 50mm (APS-C DSLR) <skip long explanation>  In general people look better with longer lenses.
  • The depth of field is different here too.  I’ve traded off the medium telephoto wide aperature look of the 85f1.4 against the longer focal length f4 of the Hasselblad.  It’s produced good isolation in the backdrop but much more detail in the face (not sure Mary is going to be 100% happy about that).  Again, it produces a very different feel to the image when you see it big.
  • It slows you down.  Even digital medium format is a slower process than 35mm and shooting 12 shots per roll and having to manually wind the film each time really slows you down.
  • You’re out from behind the camera.  Shooting with both eyes.  Different viewpoint, different interaction.

Now I think for some subjects I like having the freedom 35mm digital gives me to keep shooting to get what I want.  But this takes more discipline.  You tend to go for static emotion to get more ‘keepers’.

Of course there are drawbacks to using film: it’s taken me a week to get these back; it’s taken me over an hour to get them scanned; some of the negs are damaged and most are dirty or scratched (more of this later).  And these days if I wanted these traditionally printed then I’m not sure where I’d go to get them done.

But that ‘film look’ is there with the dynamic range and contrast that we all strive to achieve in our black and white conversions (even though this is a rough-enough scan of the neg).

On the whole I think it’s worth doing more with this and exploring how it can be used.  I don’t think I’ll be going digital MF just yet though.

The next step up is of course Large Format.  Again there is a change in the way images feel not just because of the resolution but also in the way the cameras and lenses behave (focal length, tilt, shift etc).  More on this from Gregory Heiser

For the record these were shot on Ilford XP2 super (400 ASA).  Mainly because I know I can get 120 film C41 processed here in Cork but I have no idea where I’d get traditional black and white done without doing it myself.  I’ve always loved XP2 from way back in my student days so no issues using it for this really.  It was fast enough to shoot with the ambient daylight on the tripod at f4.  I’ve done preliminary scans on these using my old flatbed scanner which has a TPU.  It’s not quite wide enough for the full 120 film and not in any way as good as a proper film scanner like the one I have for 35mm film – but good enough for now and the lab can scan anything I want to do more with.

Shooting Nana Part 2: Instant Gratification

While I wait for the 120 and 35mm films to be processed I have the digital files to look at.
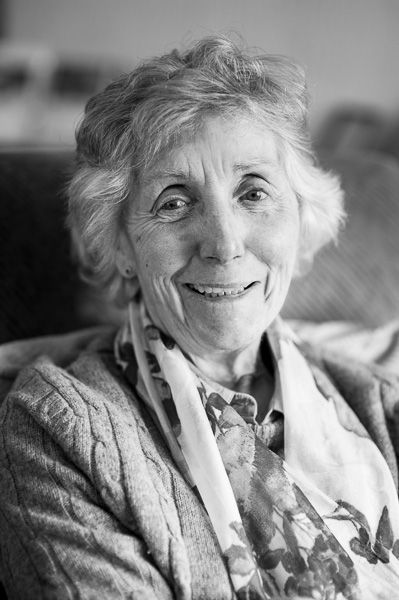
Digital has changed pretty much everything about photography apart from the fundamentals of a good picture.  There’s good and bad in there though.

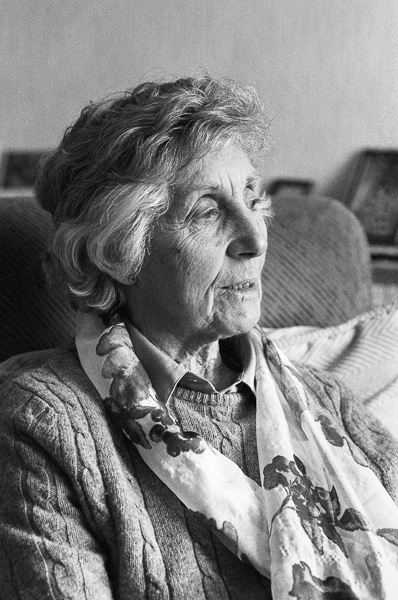
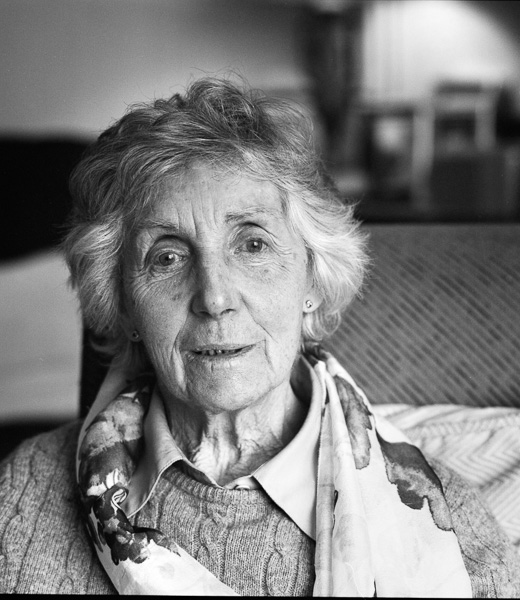
I set Nana up in the window light and had the Lowel available of fill or a hair light.  I used the D700 to check the exposure and the level of fill before running off on the Hasselblad. Then I shot a few more before running though the film and a couple more at the end, playing with the light.

She was pretty cool throughout but definitely got more relaxed as the session went on.

The main challenge for the digital part of the job was to work with it on the tripod, come out from behind and shoot with the cable release while more actively engaging with my subject.  Just like the old days.

The problem is that I like my portraits – especially like this one shot on location – with soft backgrounds.  In fact I like everything soft apart from the eyes.  The eyes are the window to the soul.

I went through the ‘everything tack sharp’ phase but I released that I have always been drawn to shallow-focus images.  Before I started looking into it critically I was always ‘wowed’ when I got one right (usually out of necessity cos it was dark).

They work because your brain automatically draws your attention to the sharpest thing in the shot – the eyes.  All that creamy soft background adds context but automatically isolates what’s most important about your subject. 

Then thanks to David A Williams, I released that portraiture isn’t about tack-sharp detail, it’s about emotional connection with the subject.  The fact is that most ordinary people don’t want to be able to see every pore, they want you to capture their nature.

So anyway.  I like shallow focus, that means that I have to go to great lengths to make sure focus is extremely accurate.  This is hard enough when you’re looking through the finder in complete control of the camera.  But how do you do it when you standing next to it with a release in your hand.

There are a couple of ways I can think of:

  • Tell them not to move.  OK for this subject.  Most of the time.  Not so for others.  And what if she does something spontaneous that’s nice like leaning forward (did happen).
  • Stop it down to increase your depth of field so if you’re a bit off with focus then they’ll still be sharp – OK but now you’ve lost that creamy shallow focus look and of course you need more light (or more ISO) to work with.
  • Use the camera’s AF to track the subject. Tried this one previously and it worked reasonably well.  It did track but a significant number were still soft (critically so).  I think I also discovered this ‘thing’ using AF-C wide open that was giving me some additional misses.  Good but not 100% happy.
  • Use Live View – on this generation of camera Live View has a significant lag to shoot the frame and the focus is less acurate.
  • Use ‘intelligent AF’.  Most pros tend to turn ‘intelligent’ features off because they are hard to predict – so in any given circumstance you may not know what they’re going to do.  Others just don’t trust technology just because they know what they can do without it and don’t bother to explore the limits of the tech.  So you get the ‘Manual Only’ photographer who still says he’s quicker than the tech.  Personally I think if you pay all that money for the latest technology you should use it.  But you need to know how it works and when to either turn it off or otherwise help it out.  So I use AF with a single point on subject, AP with compensation, Auto ISO with limits (and turn it off when it’s not helping), AWB (but shoot RAW).

I wanted to see how the Inteligent AF worked – in the case auto area AF-S.

Well guess what?  It worked very well.  Those Nikon guys have been working out!  There is a slight lag in focus compared to the single area focus I normally use but I don’t think I missed anything.

I helped it a bit by stopping down to f2 for most of the images (even f4 on the 85mm) but even the few I took at f1.4 seem pretty good.  Now she wasn’t moving that much and I tended to lock and watch and re-lock if I thought she’d moved.

I’m not a fan of techology for it’s own sake but this stuff really works – the combination of fast, accurate AF that is biasses towards skin tone and works in low-light, great low-light performance (so you can shoot at f4 in someone’s living room) and great, fast lenses make this work very well.

And I really enjoyed being able to forget about the camera.  Just chat away, watch my subject and fire when something interesting happened. Particularly with someone like this, who wasn’t ever going to pose for me.

Of course there’s a tendacy to look at me and not down the lens but you can always ask to look into the camera and you can always go back to the viewfinder.  But you’re much more able to see what you’re subject is doing out from behind.

A lot of good photography is about watching.  Watching and reading, trying to predict and stimulating a reaction.  It’s much easier with both eyes.

So I think I might bring this into more of my formal sittings and continue to work on it.

Processing-wise I chose a black and white conversion in Lightroom 4. Upped the orange filter for better skintone, adjusted contrast, blacks, whites, clarity and shadow.  A small bit of healing on the skin here and there and that’s it.  Not big photoshop on this one.
 

Shooting Nana Part 1: What and Why

So the January (now February) project was to shoot my Mother-in-Law.  With a camera that is.

There’s perhaps more to this than it would seem.  So what’s the point:

  • To photograph someone you know quite well.  I find this especially challenging, whether it’s one of my kids or someone in the family.  In a session with a new sitter you discover an aspect of their personality and you capture that – whatever you can discover (and they let you see) in the time available.  Familiar people are multi-facteted – you know more about their different sides and you need to decide what you want to capture – and then how to get them to show it to you (and then actually capture it).
  • Come out from behind the camera.  People interact with other people not machines.  It’s plainly obvious in some shoots that a subject is very happy and relaxed while you’re chatting but as soon as the camera pops up to my eye they loose all that and go into ‘snapshot mode’.  Not what I’m looking for.  I’ve been looking at the way a number of my photographic idols worked and an integral part of getting out from behind the camera and being more direct with your subject (Avedon, Heisler to name drop a couple).  I’ve tried this a couple of times and it’s been good.  There are two parts to this one:
    • Shoot with the ‘blad.  I own a Hasselblad 500c and 150f4 lens (it’s on the left of the pic in the last post).  I’ve used it once.  I bought it mainly to try shooting with a waist level finder and come out from behind.  I also wanted see what difference shooting medium format made (larger capture area, longer lenses)
    • Shoot with the D700 on the tripiod with the release á la the ‘blad.  I’ve done this a couple of times and it was a good experience but I still like shoot these portraits wide-open so I need to get the focusing thing right when not in total charge of the camera through the finder.
  • To photograph a ‘stable’ subject.  Photographing kids is great fun because they are so dynamic and so responsive.  But never being able to rely on your subject staying in the same place doesn’t let you set up fancy portrait lighting or use manual focus or anything like that.
  • Shoot for pleasure.  The other thing about non-commercial work is that there’s no pressure.  You get the chance to experiment.  As long as they sitter gets a couple of nice shots it doesn’t matter if not all your experiments work out.  You get the chance to learn from them in an environment where there isn’t a client expecting a range of perfect shots.  If something works out then get it down pat and include it in your client work.
  • Having taken on shooting with film for the Hasselblad, why not burn off some of that old film stock sitting in the fridge too?  I get the pleasure of handling one of my favourite machines – the F4 (in F4e configuration for a change – doesn’t look as cool as the F4s but handles better) we’ll see how the film compared directly to the digital in the same scenario.  While I’m at it there’s a few frames left in a old film that’s been in the FM2n for a while now.  So strap the motor-winder on it and use those with that lovely Manual focus 50f1.2 AIS.  At least I’ll find out if all this stuff still works.
  • It also has to be said that Nana’s not getting any younger.  She’s also usually a terrible sitter for photographs.  She puts on this acidic stare when the camera appears or just talks all the time so her mouth is open all the time in a non-expression.  So this is going to be something to take some care over.

Easy right?  No.  Fun?  Well yes actually as it turns out.

With all the talk about fancy portrait set-ups I went for something straight forward.  I went to her place partly cos it’s freezing here but also cos I thought she’d be more comfortable at home.  I also like the context of shooting her in her own living room – where so much of life has taken place (second only to the kitchen but not much good light there).  I did introduce a light for fill / hair at the end.

Again the challenge about shooting someone you know is choosing something appropriate for location, setting and style.  Nana is at home, well ‘at home’.  She’s also not that mobile so this works for her too.

More about how it went in the next post.  The films have gone to processing but of course the advantage of the digital is that you don’t have to hang around for all that stuff anymore: