So it seems that there are more AI updates in Lightroom and Photoshop according to PetalPixel
My needs are limited but I have been trying out some of the selection and removal tools to save me doing things the hard way. And mostly there is a saving.
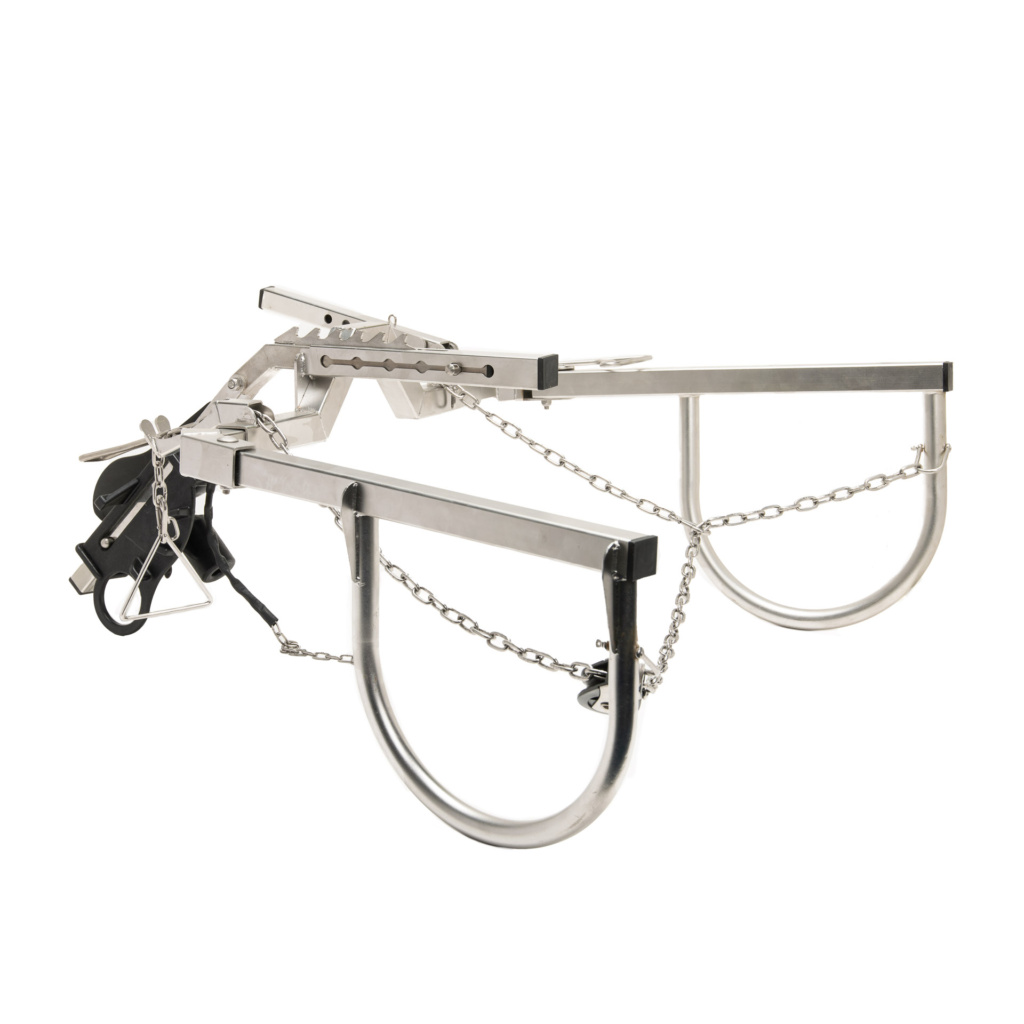
It still isn’t perfect. Cutting out the Tail Jack probably got me only 50% there automatically and the rest needed to be done by hand – sometimes it cut too much, sometimes it missed parts so the mask needed manual edits
Photoshop’s ‘Select Subject’ missed about 50% of the Tail Jack
Sometimes though you press the wrong button and weird stuff happens:
No idea what I did here: maybe ‘content aware fill’ of the background?
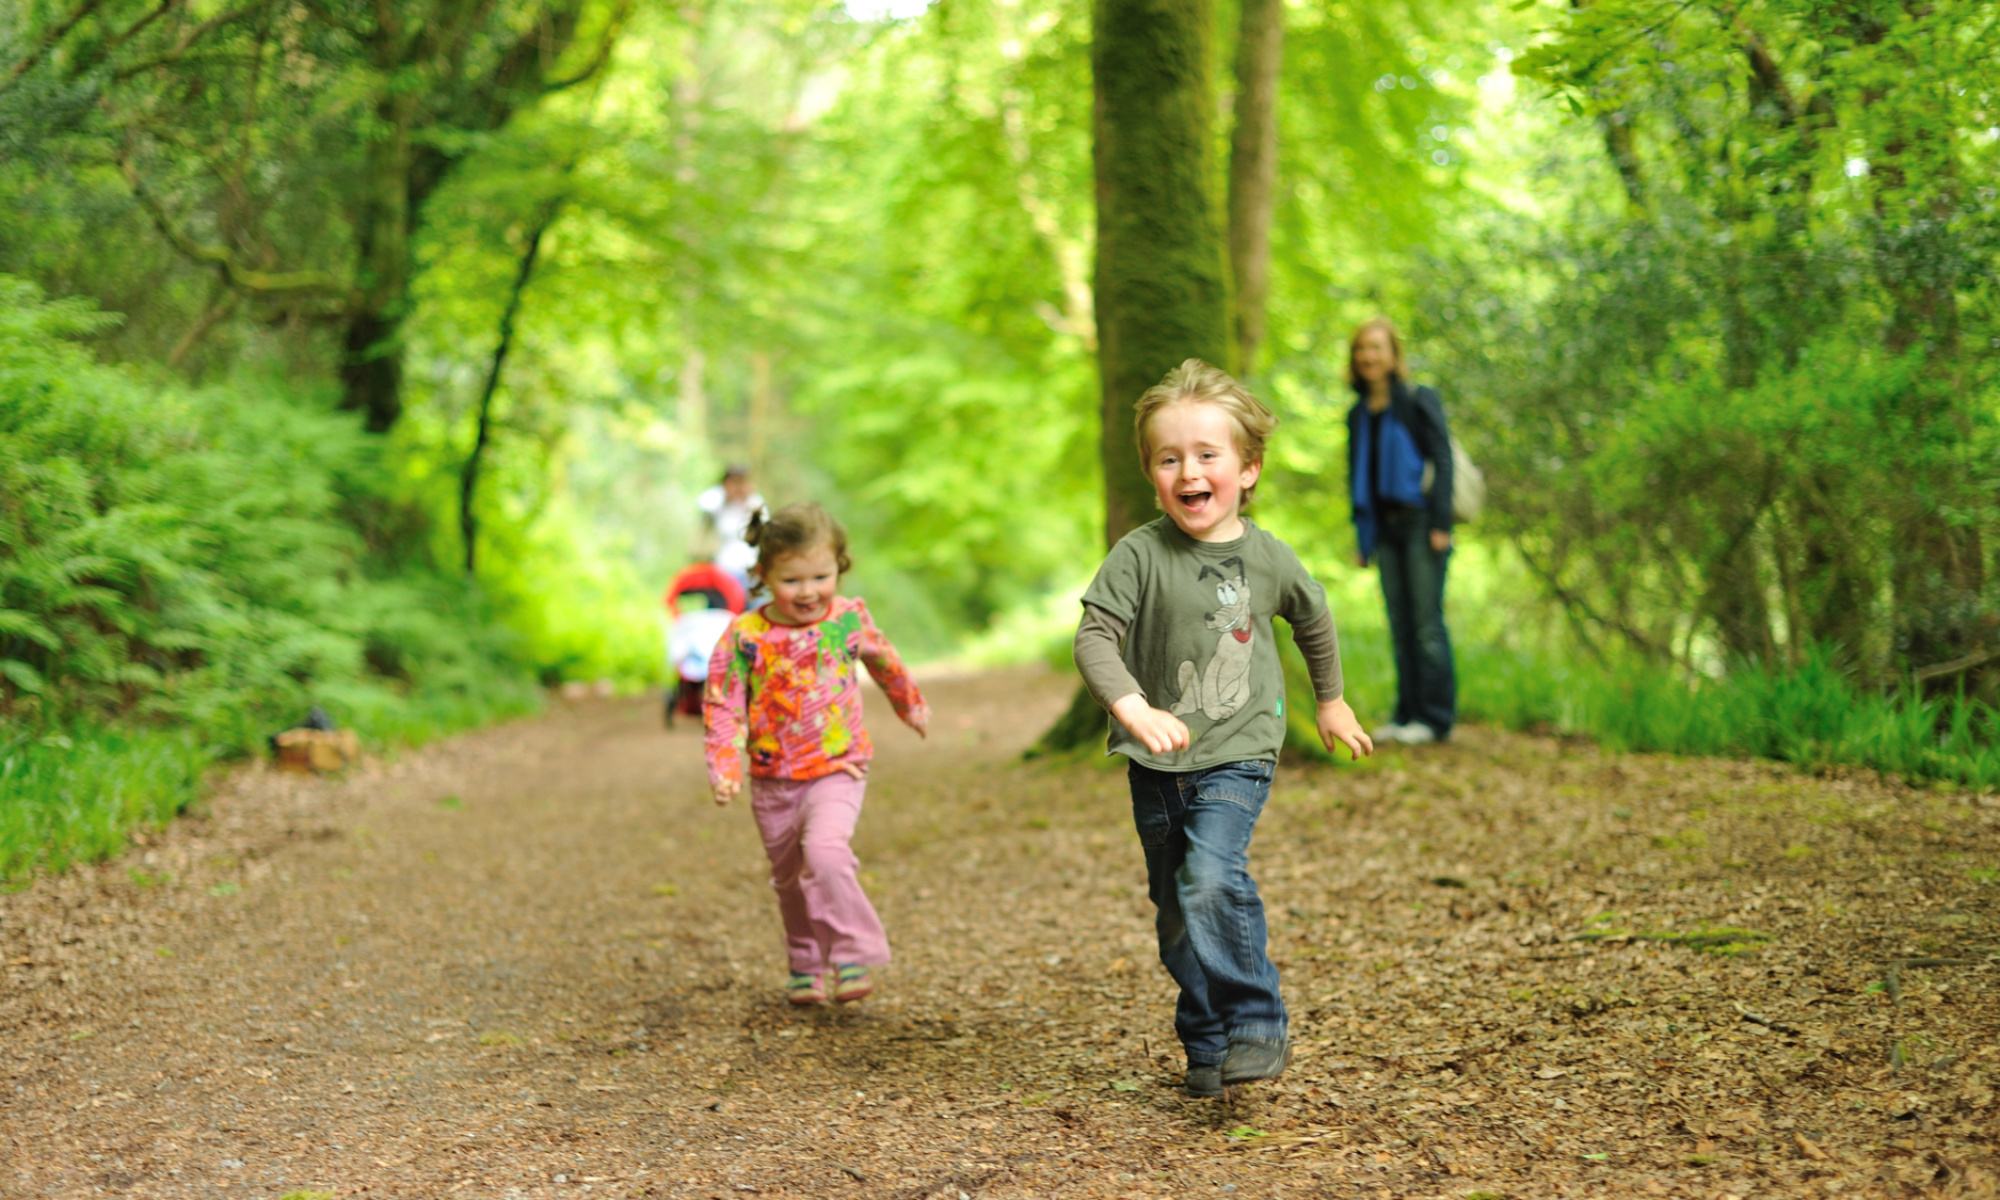
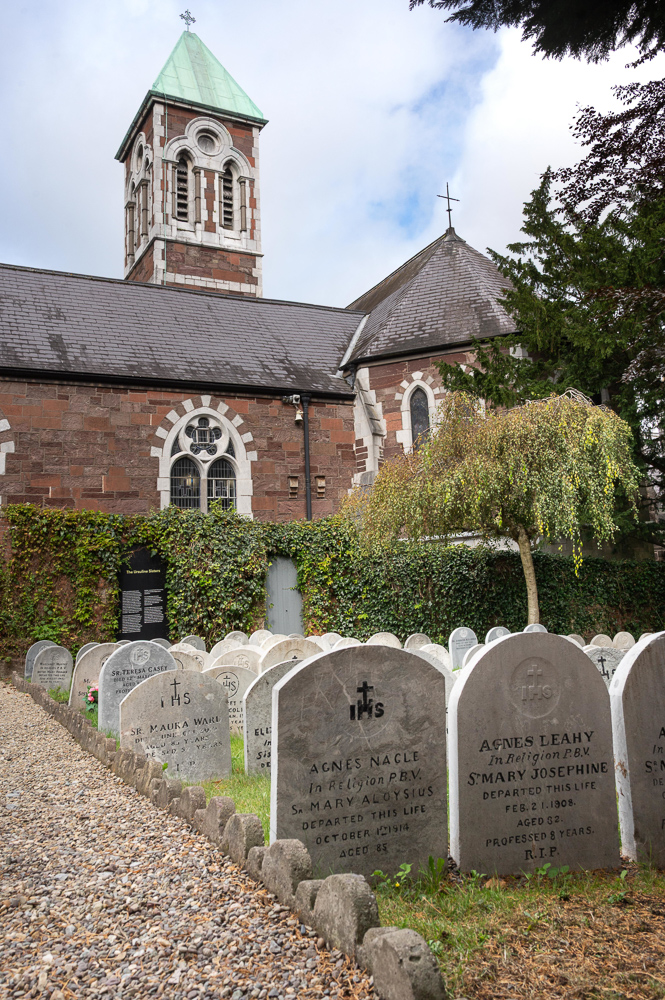
I had a short wander around South Parish yesterday looking for a little inspiration. The gardens of Nano Nagle Place are lovely. Very calm, very peaceful. I just brought the fixed 28mm f2.8 lens and took a few photos. They don’t really do it justice.
But I wanted to show how post-production can improve an image, even if it can’t make an uninspired photo great.
This is a familiar situation: the foreground in quite deep shade and the sky is much brighter. I’ve exposed somewhere in the middle.
There are a few ways to deal with this:
Introduce additional lighting to the darker areas and expose for the brighter areas. This usually means a flash but can be a reflector. This introduces a few problems to solve: the correct balanced exposure between flash and ambient (assuming you can get enough power from the flash to compete with the daylight); the quality of the light produced by the flash (watch out for nasty, flat on-camera lighting); the colour temperature of the flash compared to the ambient (did you bring gels too?).
Combine two or more exposures
Manually using two or three metered exposures. One of the sky, one for the building and one for the shaded stones. Then combining them in Photoshop/GIMP selecting the bits you want. Or using HDR tools in Lightroom to do it automatically. Your different images need to overlay each other perfectly to combine easily.
Using automated HDR tools on you camera. Depending on your camera this may be easy or may still require some work in post production. Again the less you move the camera between exposures the better. Your phone probably deals with this best TBH.
Taking one image in RAW format and using the dynamic range of your cameras sensor to try and recover as much as possible.
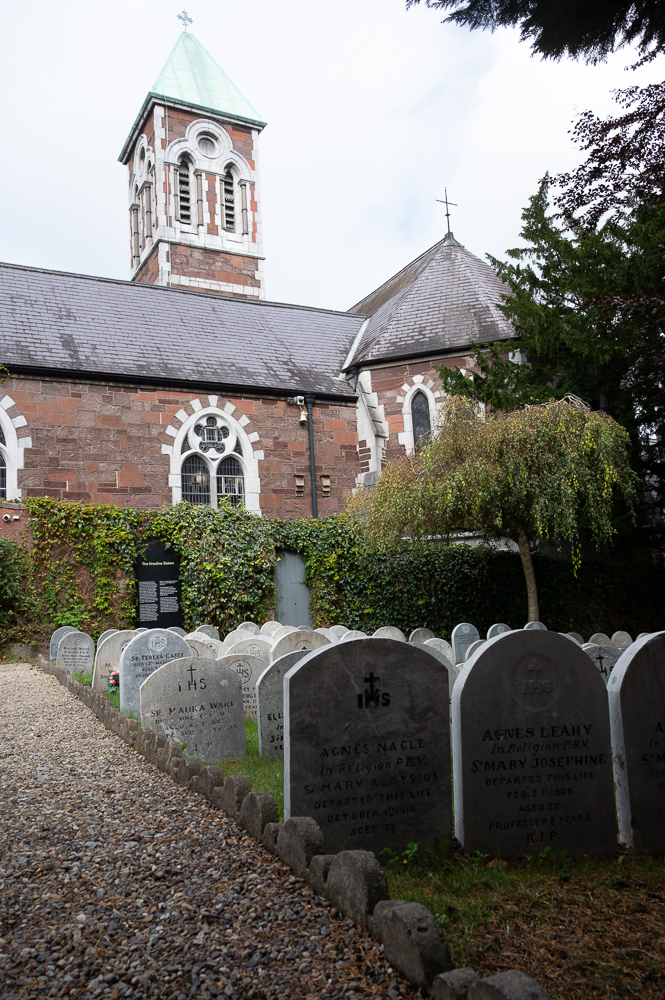
Now I had no flash and no tripod and in fact I had to use the screen on tilt to push the camera to the far corner of the graveyard to get as much in as possible with the 28mm (so it was a bit wobbly and hard to get straight). Even though it’s now 2 generations old, the Nikon Z6 still has class-leading dynamic range so let’s see how we get on.
So Lightroom was able to do a huge amount to balance the overall exposure. I recovered the shadow area (simple gradient mask) and the sky (using the AI sky detect mask). Warmed it up and bit and improved the colours. I could have made the front stones the same as the others but I like them a little darker.
I also used the Transform tools to straighten out the building and fix the wide-angle ‘lean back’ look. However in doing so I lost the very top of the spire.
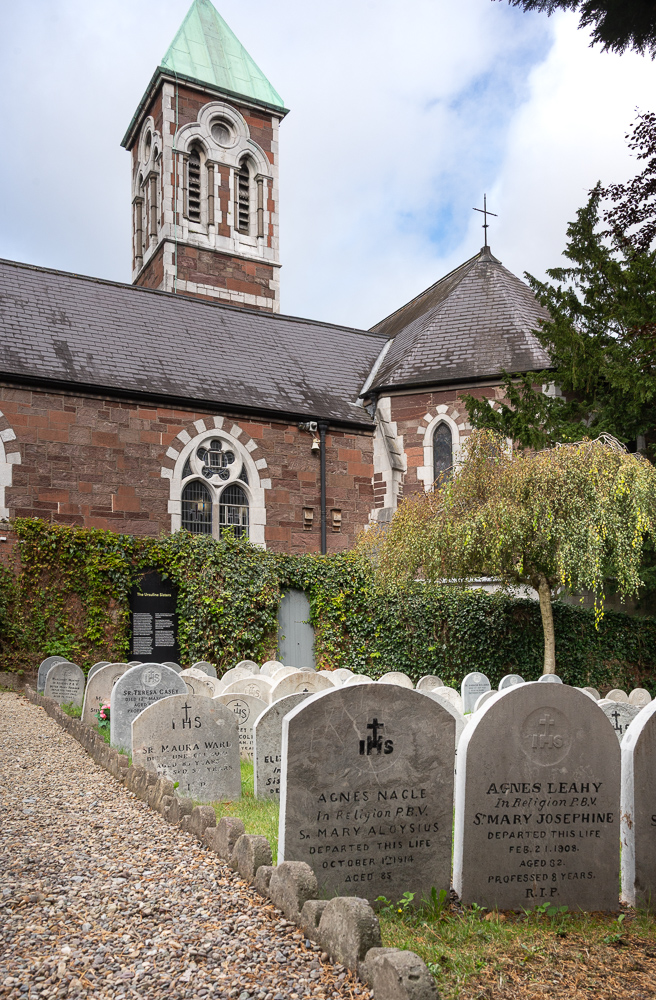
I thought that wasn’t necessary so I undid the transform and sent it to GIMP. A simple overall skew allowed me to straighten the building and keep the top of the spire. It’s not quite the same and in this case the gravestones aren’t straight anyway so it’s better overall.
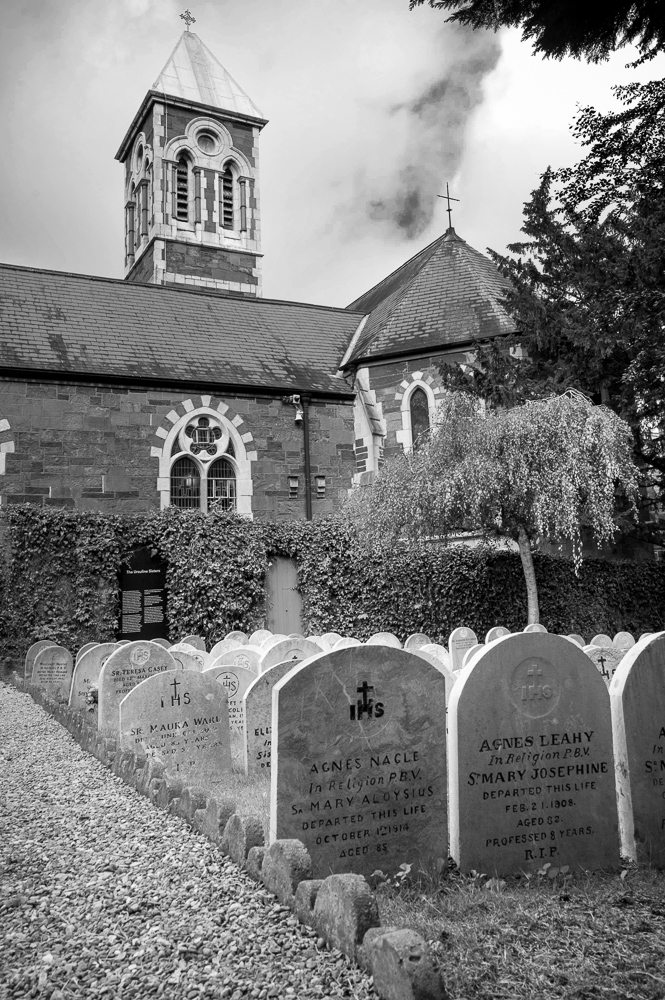
Does the black and white make it stronger? Back in Lightroom I’m using the black and white tools there to add contrast, create a full black, darken the blue of the sky for more drama, lighten the greens and the orange (of the building). A black and white conversion can’t rescue a mediocre photo. It draws the viewers attention more to the structure and simple tones of the image where the colour might distract.
I could probably have waited for ‘better’ clouds – more blue and nice fluffy whites.
I see a lot of people using the AI tools in these products to try and enhance their images but it helps if the fundamentals of the image are strong in the first place. The main culprit is crude pulling back of the sky – often with a mask that includes towers like this one so that they go dark as well. Looks bad to me. It’s worth learning to use these tools properly and being sensitive with their use.
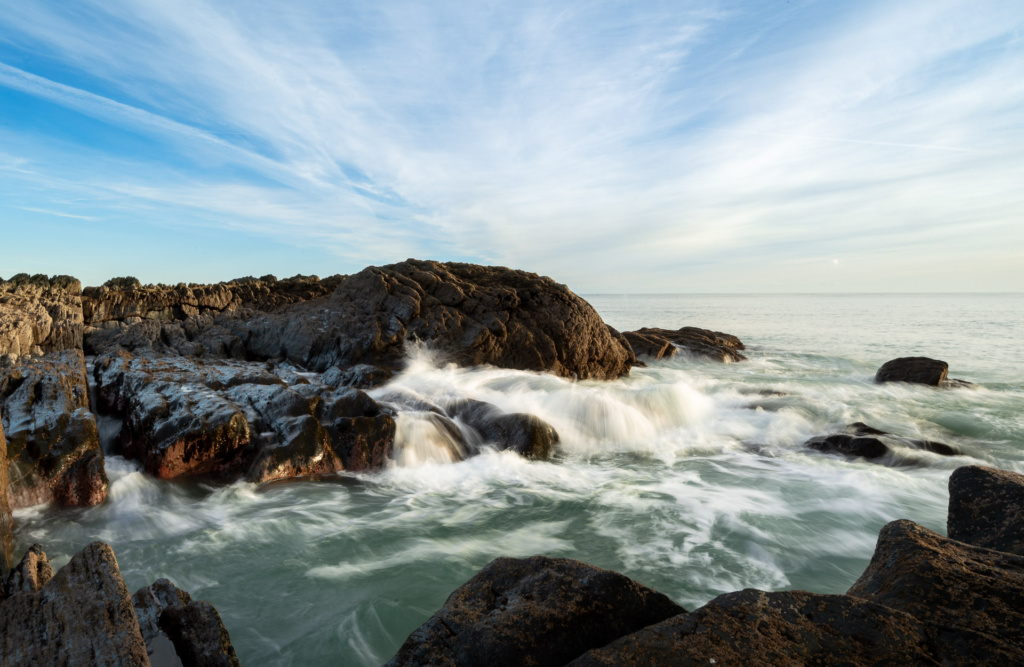
Starting now to play with the features of my shiny new updated Lightroom. While we previously had some limited masking options they have significantly enhance those which means that it’s less likely to need to go to photoshop for detailed edits. We’ll see how that goes.
I liked the Darktable edit but while the sky was pretty much ‘as seen’ I thought it could do with more impact. I found it easy to completely over-do this and make it a bit mad so there’s a bit to be said for subtly here.
Anyone who has been on my course in Ashton or was at the presentation I made to Cork Camera Club this year will know that I’ve held out with Lightroom 6 for a long time (is it 10 years?). It was the last version you could own without the subscription and frankly it worked fine for me and it did everything I needed it to do. I was lucky that my main cameras RAW files (D850 and D500) were supported and when I bought the Z6 I had a work around via DNG files that was OK since it wasn’t my main camera.
But I always said that my next PC or camera upgrade would necessitate subscription to the latest version and I was only really holding off to be frugal.
Today the Adobe removed the lowest subscription plan in favour of the better cloud plan (which I don’t use). So yesterday I signed up while I could and will be learning what’s new in Lightroom and Photoshop for the next few weeks. I’m sure that every now and then those features will be useful. And it will be nice to edit the Z6 RAW files directly. I was getting used to GIMP though and not sure if I’ll bother to get that proficient with PS 2025.
Just to prove a point though, I edited a short series of images taken in Mytleville and Poll Gorm over New Year using Darktable and GIMP on my Raspberry Pi 5. It wasn’t completely painless – considering I’ve never used Darktable and the Pi isn’t that powerful – but it certainly presents a viable, free alternative.
Photographers have a lot of fancy tools available to them these days but I usually end up doing things the hard way – straightforward clone tool in GIMP
The trick to removing something is to work out what to put in it’s place. Generally there’s something in the frame you can use as the basis for a replacement – a bit of wall or a plant or something that will cover whatever shouldn’t be there. Then it’s a matter of blending and making it look natural.
But the cage in this photo is an issue: we have some elements to copy and use but the rad valve is partially covered but unique in the image. So a bit of creativity was required to create something that looks right
The Disappearing Dog Basket
Now it’s possible that Photoshop’s AI tools could have done this automatically. I have seen it get pretty close to some of these edits – but crucially it missed some of the reflections and shadows so needs some finishing off the old school way.
I’m not an expert in these tools. I’m a photographer with pretty good expertise in editing with the basic tools. I’m like a carpenter with a sharp chisel.
In reality, this kind of thing doesn’t come up that often – it’s usually just simple fire exit signs – so there’s no need for me to look to major efficiencies here.
Of course we should have just moved the dog basket out of the way in the first place! But the reality of most photo shoots IRL is that there is always something that you miss or can’t fix on the day.
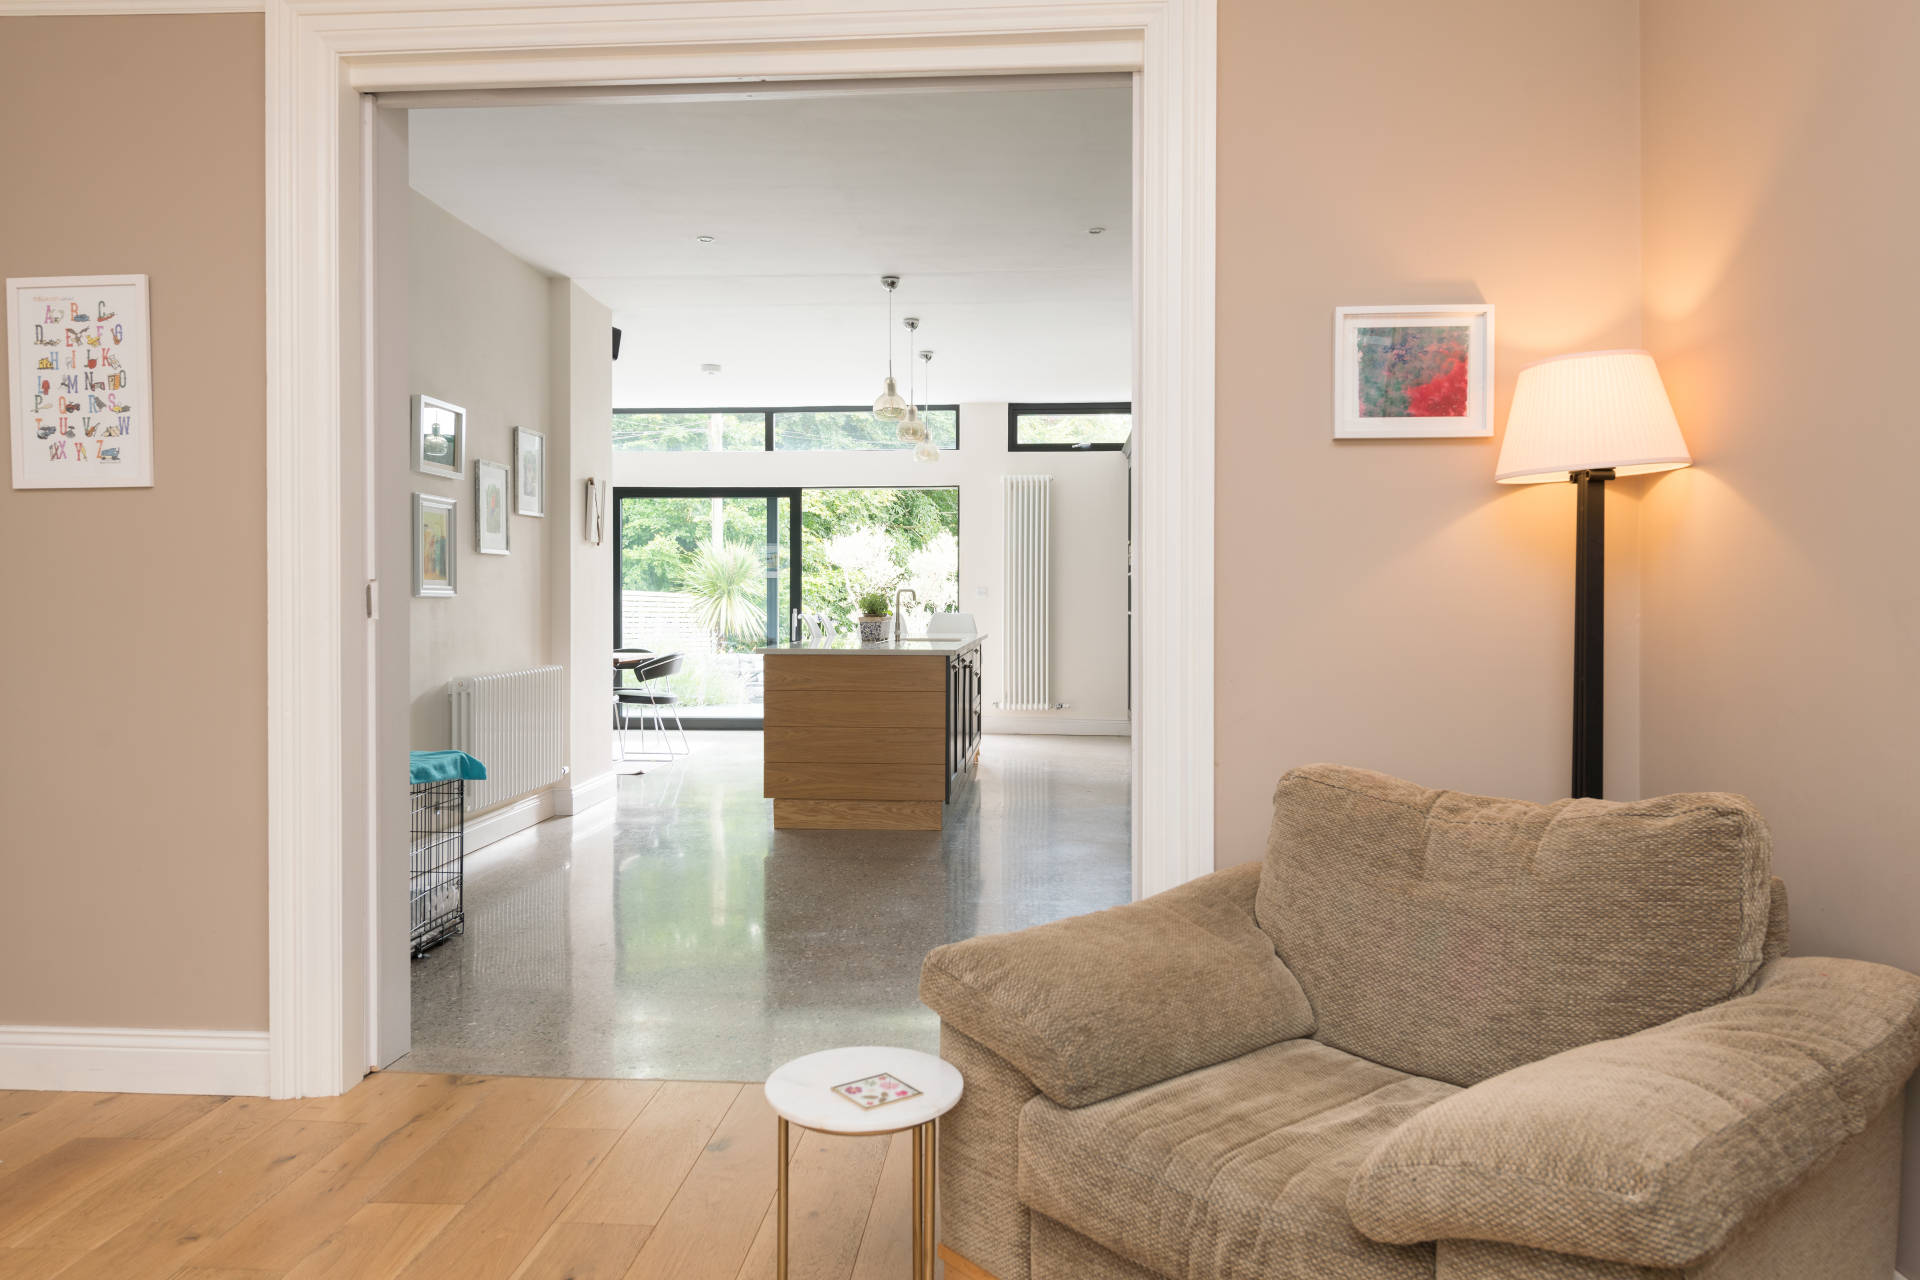
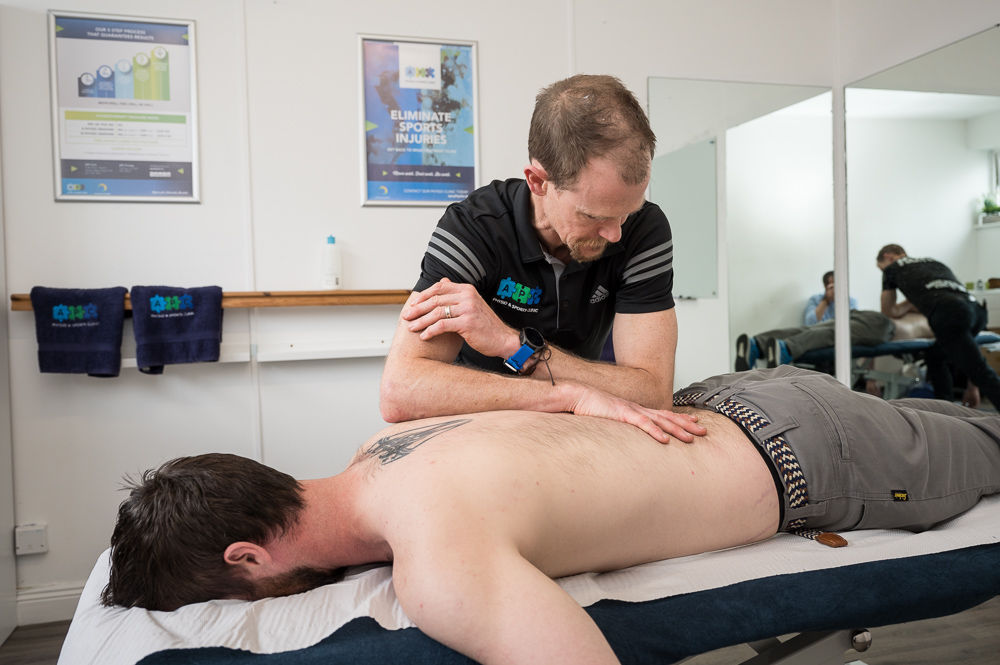
It’s been a busy few weeks between First Holy Communions, Confirmations and a lot of Commercial work. I was recently back in APC Physiotherapy and Sports Clinic. A great team who really know their stuff and had everything ready for a great shoot. Hopefully you’ll be seeing new pics on their web and socials soon.
Mirrors are my nemesis. Usually it’s just the odd mirror over a fireplace and I need to make sure that neither am I in it nor does the bounce off my flash make it look weirdly bright.
But there are some places where there are mirrors everywhere. It’s a necessary part of the functionality of the space: people need to see themselves in action in order to correct their movement or posture. So physios, dance studios, karate clubs all have big mirrors.
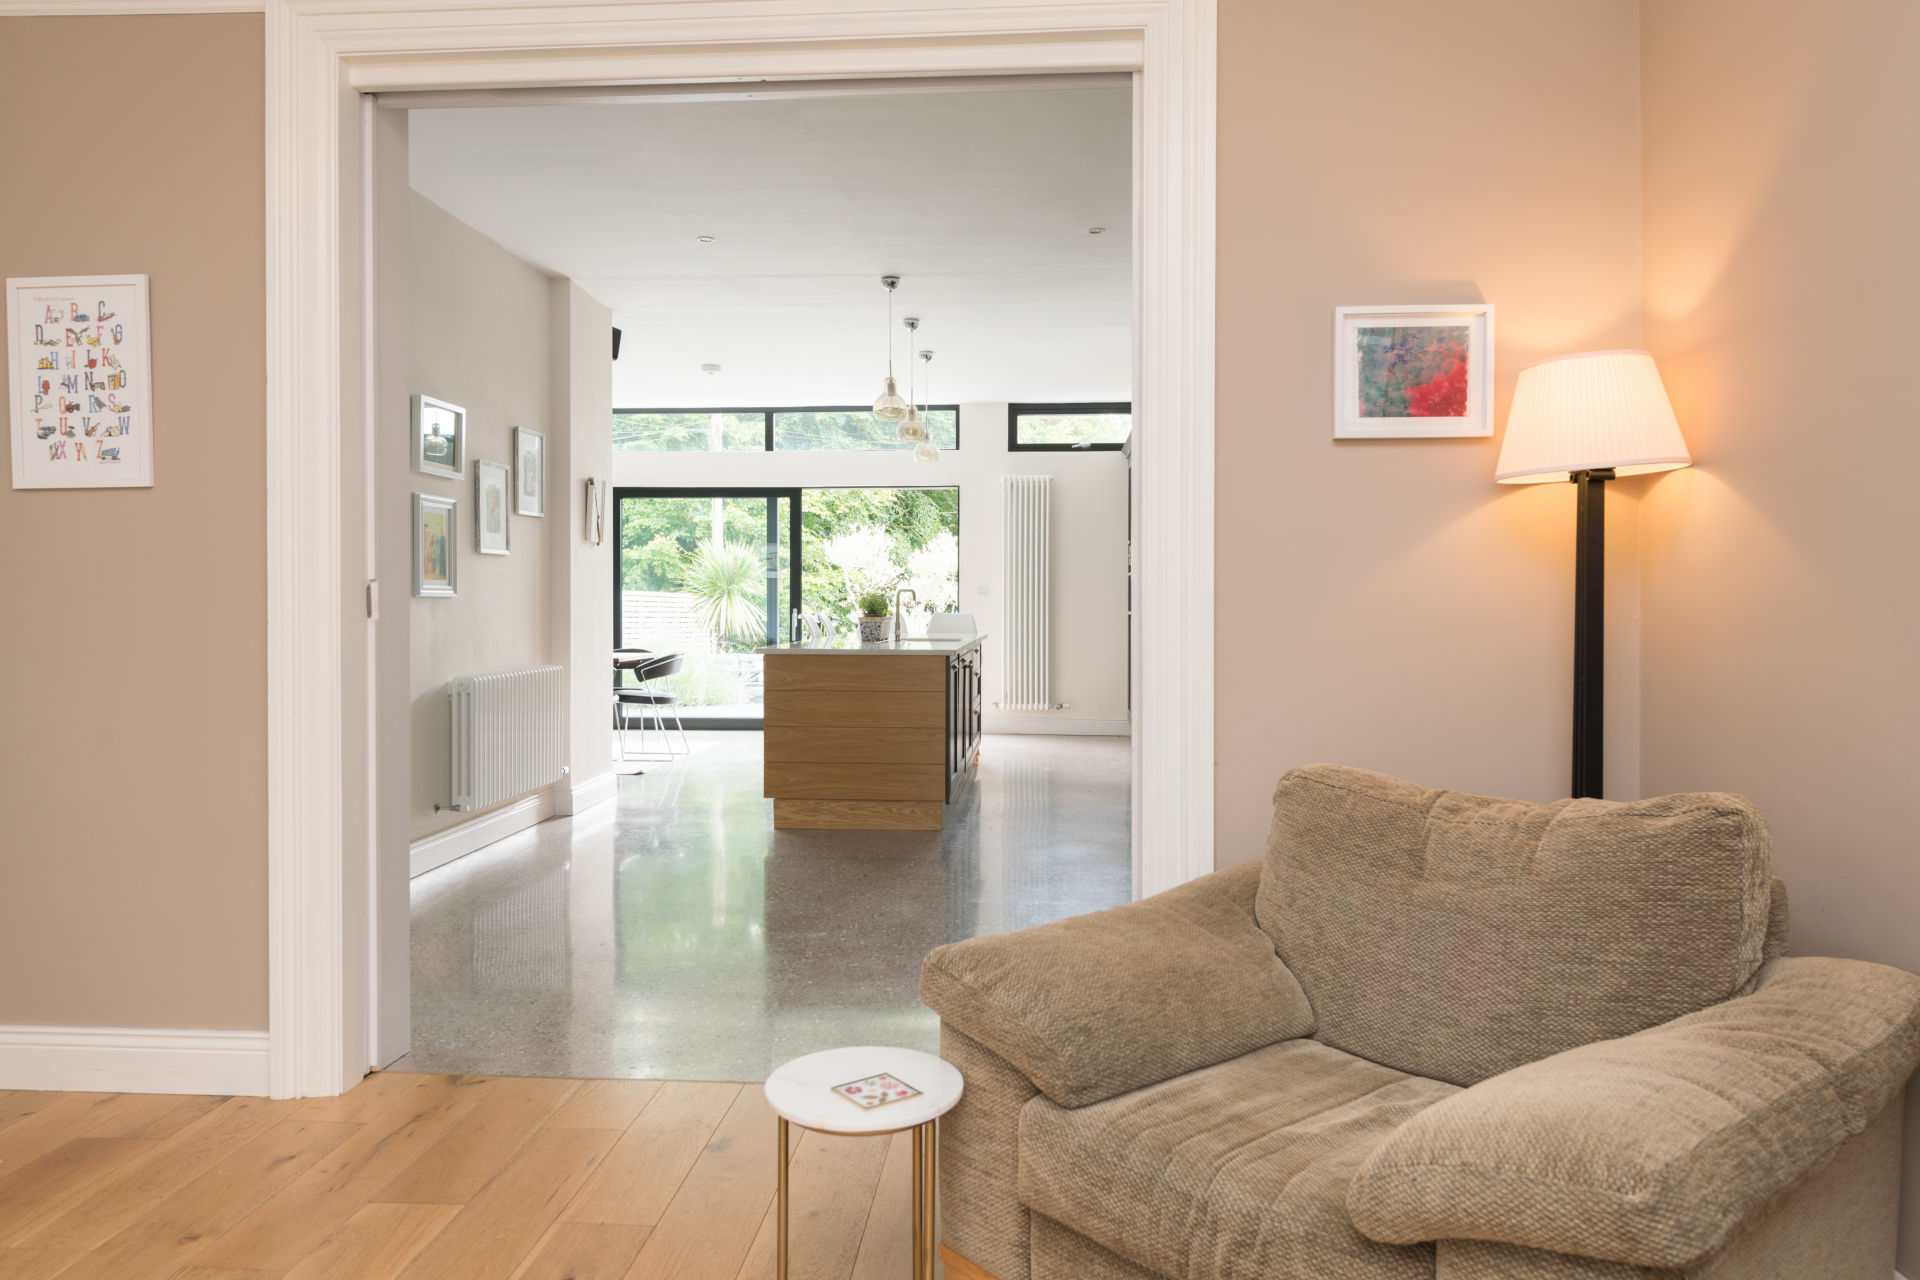
Once you know about it, then you can work around it. And in over 200 delivered photos, there was one that I was in (and couldn’t be cropped out of):
Now it’s a minor edit but necessary enough.
Can you see me?
I did a talk for Cork Camera Club about edits like this and it occurs to me that I could probably do about 2 hours of tricks and tips on this kind of thing – there are many little tricks to getting it right. But maybe the AI tools are all doing it now?
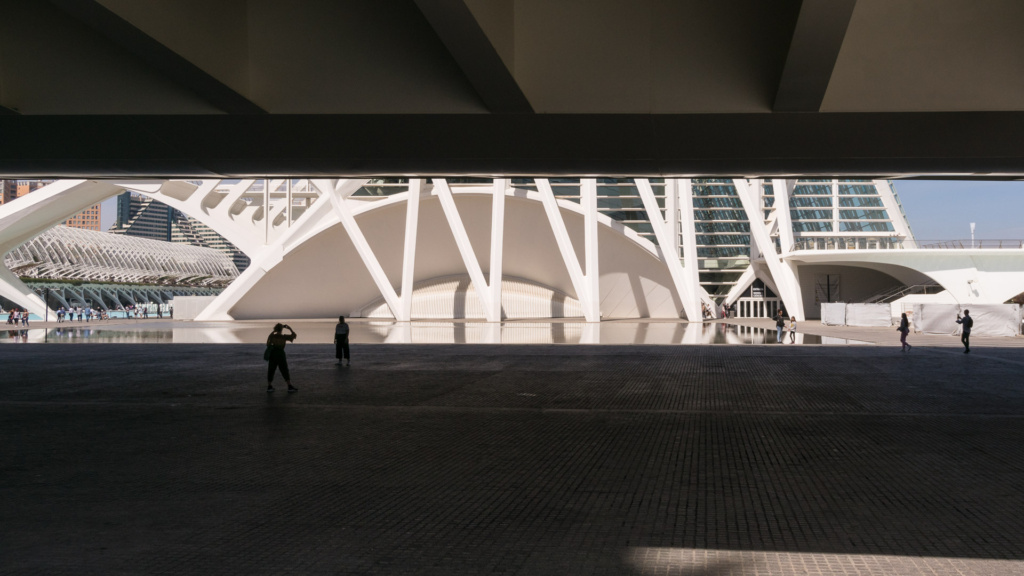
Although I take photos for a living, I still enjoy taking holiday pics. There is always the expectation of finding a new way to capture a much-photographed location: whether it’s just because you have a fresh, unique eye for something (?) or just because you get lucky with something unique occurring when you happen to be in location.
Valencia was a mix of both: the last weekend of the Fellas (a mad festival of sculpture, parades and very loud firecrackers); and these very modern buildings waiting (begging) to be photographed.
The Fellas is pretty hard to capture and like a lot of things you need to be in amongst everything and I was on holiday, I did capture some of the artwork. The trick here is to find a different view of things (and try to exclude a much of the clutter as possible).
I do have a grá for slightly abstract photos of modern buildings (especially with nice blue skies) – and especially in black and white. It goes way back to shooting the Grandstand in Epsom with black and white film and a polariod + red filter combo to make the sky go black.
And although I’m sure these buildings have been shot a million times, and maybe in better conditions and with more time (much fewer people for a start!), I did have fun.
Looking around at what other people were doing, there are a few teaching points:
I used a wider angle lens (on the Nikon 1). This exaggerated and emphasized some of angles and perspectives of the buildings.
I didn’t always try to eliminate the people – they are part of the landscape in a busy tourist attraction like this.
Look up, squat down
Look for abstract details: shapes, colours and structure. Isolate them (I also had a longer lens with me)
Think about contrast – and possible options for black and white images with high contrast.
MOST OF ALL: keep your eyes and mind open. I particularly like this letter-box photo viewing between the bridge shadows and rather than waiting for the people to clear out I like the people in there as silhouettes (especially the two taking photos). Also I think I as the only one to spot the reflection in the water in front of the building at the side. The other water features may be been intended as reflection pools but it was too breezy that day apart from around the side.
If you call me and I don’t pick up, please leave a message or text me.
I’m getting loads of cold calls from Overseas Call Centres which cloak their VPN call using random Irish mobile numbers. If you call these back, you get that random person’s number who hasn’t got a clue what’s going on because they never called you. I’ve had some of those calls (and made a few), it’s very confusing. So in general I’m now not calling back missed calls from unknown numbers unless there’s a message or a text.
I got four missed calls yesterday in a row. New business or time wasters?
These calls are really annoying and a massive waste of everyone’s time but don’t see what can be done, if you block the number you risk blocking a real person who might one day need to call you. And I’m sure they use a different number each time.
What boggles the mind most is that these companies say that they are ‘Marketing Experts’ but not only do they not understand GDPR but they are actually loosing me business if a new client calls but doesn’t leave a message.
So please call me if you think I can help. If I’m with a client I won’t pick up so please leave a message and I’ll call you back. Or just drop a text.
If you are a Company cold calling with a cloaked VPN. Please stop calling me.
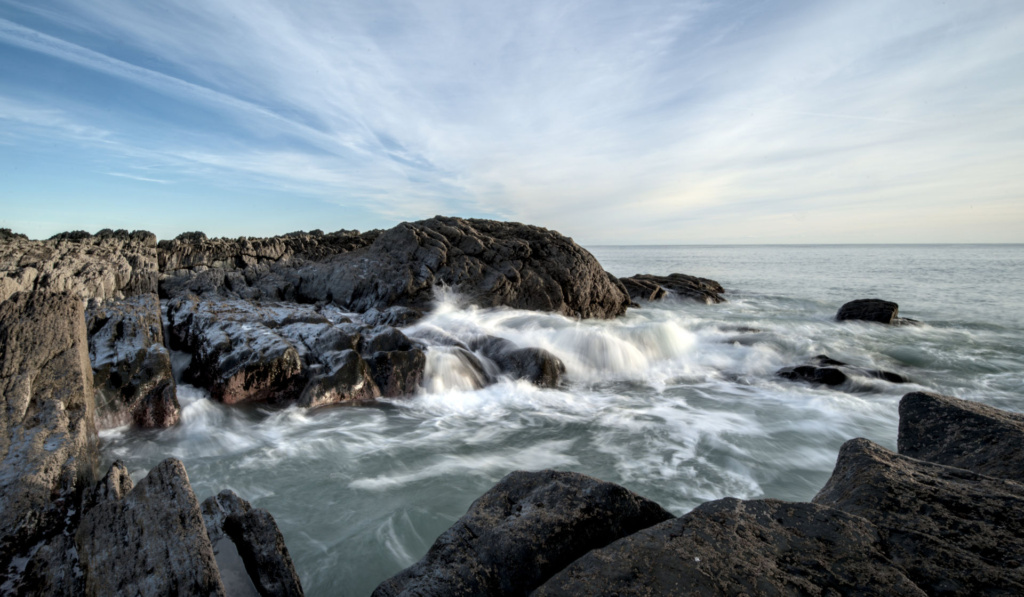
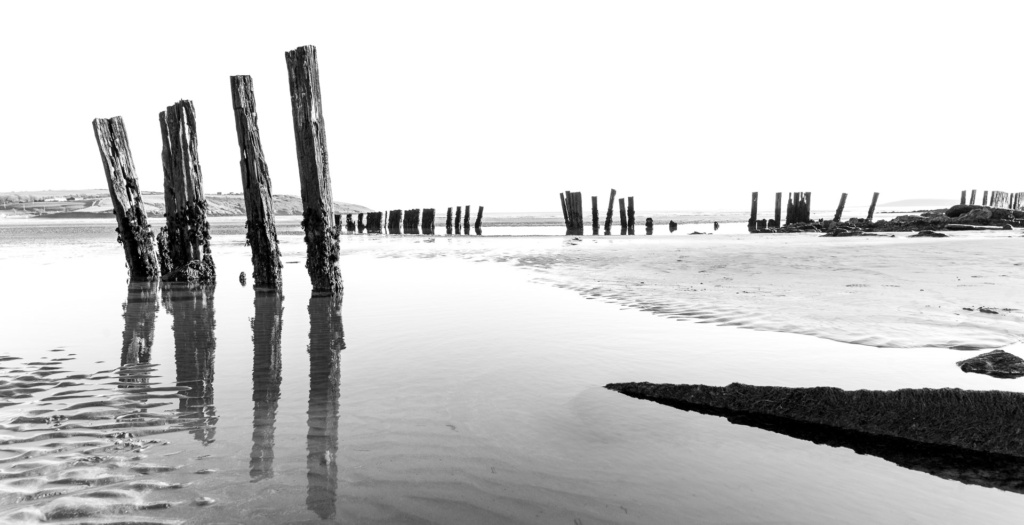
It can sometimes be a tough decision whether an image will work better in black and white or colour. Certainly many of the images in this session worked well in colour: a cold, clear winter’s day with the sun low on the horizon produced deep blue skies and high contrast on all that sand and wood texture.
But as the sun dipped lower, at this angle the colour drained from the image and inspired by some more Minimalist Photography, I dropped the colour out of the image and I kind of like it.
I use Lightroom to do the conversion, then work on the contrast and tonal separation.
A student on my evening class asked about taking pictures of the moon. It’s a facinating subject and I think it’s become current with a prominent mobile phone Ad boasting the ability to take amazing moon photos.
I’ve never really dabbled but I know the theory, and my course notes have been updated with the following about taking photos of the moon:
It’s very far away so it is very small. We often think it’s larger than it looks as our brains have the ability to ‘focus’ on the details of small things. But to the camera it’s small. You are going to need a long lens (or a telescope)
It’s very bright, especially in the night sky so balancing the detail of the moon and anything lit with ambient light (or moonlight) on earth is tricky.
It’s moving faster than you think. So if you are going for long exposures to balance out the ambient darkness then you can’t go too long before the moon itself will blur as it moves.
Most of the stunning moon images you see on the internet are
Double Exposures
Dramatically enhanced in Photoshop
Just pure fake (two images mixed: one of the landscape and a completely different photo of the moon taken with a completely different lens – and maybe not even at the same time).
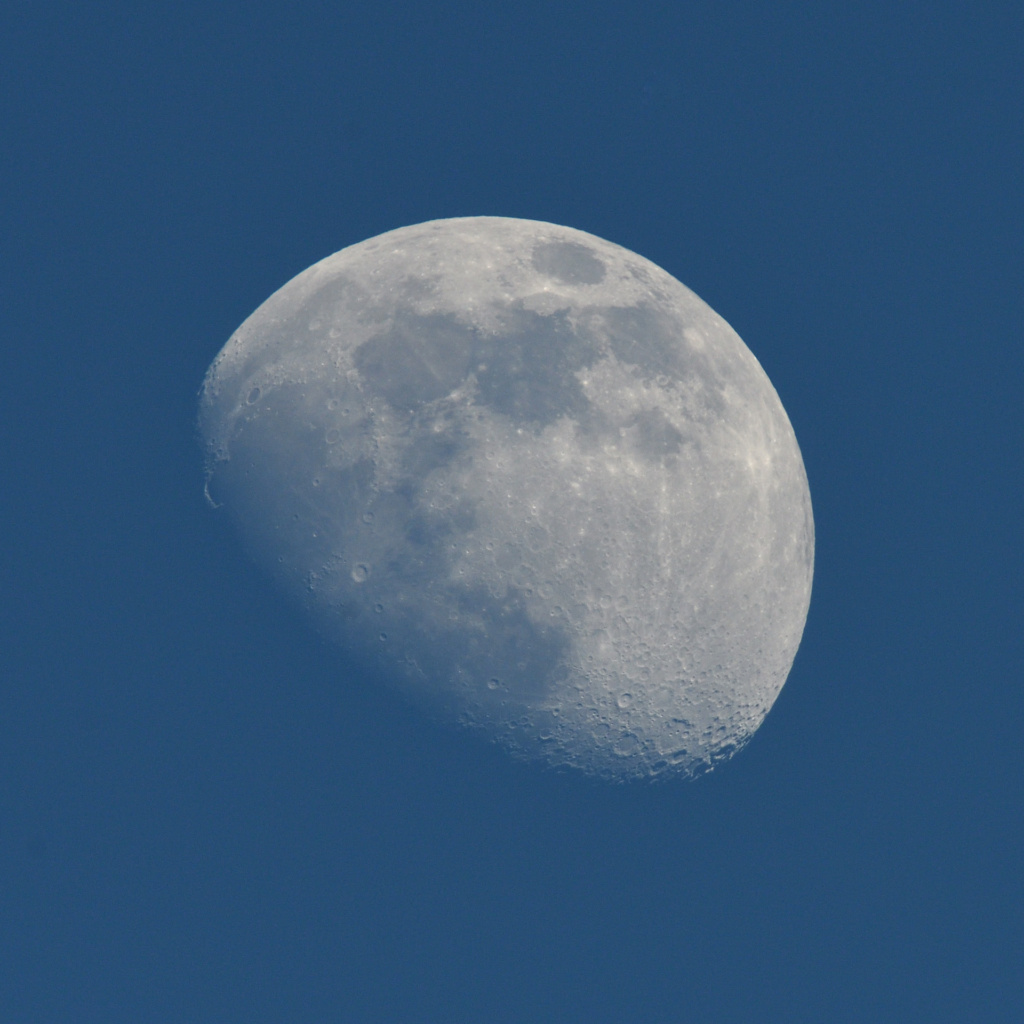
Having recently finally acquired a long telephoto lens (the Sigma 150-600 Sport) I decided that I should really try and see just how hard it is to take a nice photo of the moon. And this weekend I was in the garden and notice a nice Gibbous Moon by twilight. Now I didn’t have a tripod at home so this is hand-held, so I had to tweak up the ISO and turn on the OS to keep it steady but I think it’s quite nice.
However, this isn’t just the a long lens shot:
Taken at 600mm
With a x1.4 teleconverter
On a crop sensor camera (Nikon D500) – which is worth another x1.5
And finally cropped about 50%
Equivalent focal length, over 2000mm! Or around x40 magnification
Now this isn’t my specialist field. I do understand that the ‘large’ moons that we see on the horizon appear bigger partly because the light travels through more atmosphere (also making it less clear) but my understanding is that a lot of this is still pretty perceived so I stick by my belief that most of those dramatic moon-rise photos are faked!
So the question remains, how does a mobile phone, with it’s tiny sensor and lens package create stunning photos of the moon? It warrants more research but I read something that seems to suggest that the AI in the phone recognises that the moon is in the photo and ‘intelligently’ blends in stock or reference moon photos to your scene to make the moon look great. Don’t hold me to it, but it makes more sense than it being better than all the tech I used to create this simple image.
Now I’m off to find a landscape to paste this beauty in to…