A lot of lens filters pretty much died out with film: all those weird coloured filters you used with black and white film, fancy 1970s effects filters, even gradient filters (for most people). All can be replicated in post production. Doing it in post just makes it easier – and saves wrecking a good capture with poor filter choice.
But one filter still has a place in my bag: the circular polariser. That’s because some of the effects of the polar filter can’t be replicated in post. It works in three dimensions to affect a 2D capture.
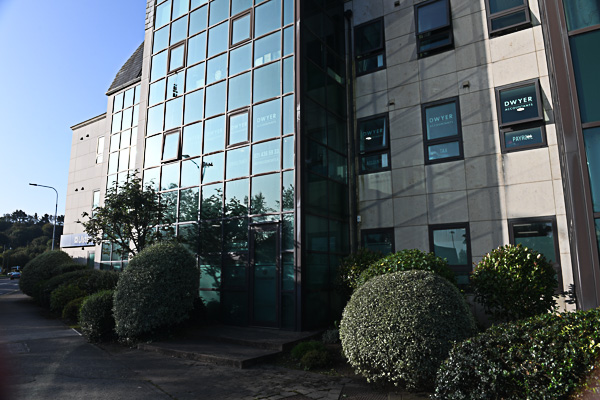
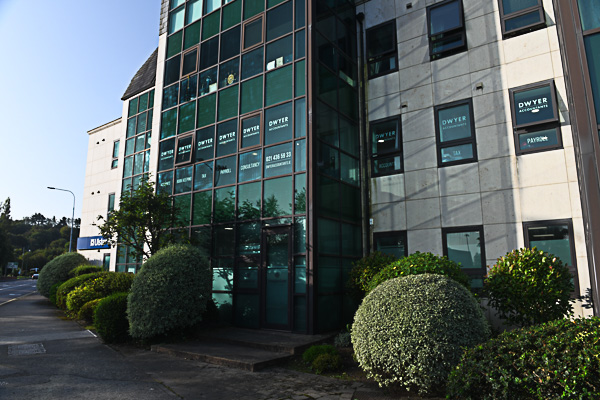
It came in handy this week for what should have been a pretty standard external view of an office building. With low sun on the building, the windows had strong reflections that wiped out the branding on the window.
Polarising the light largely removed those reflections. The reflected light as a particular orientation which can be removed by the filter if you rotate it to the correct plane.
Can’t do that in photoshop!


Now we can also now see the crap in the window of the apartment above – and I’ll have to remove the bird poo in photoshop. But the branding is now clear.
The other main use of the Polarising Filter is to saturate your skies. Now that you can do that in Photoshop but the filter gives you a head start.
I do get questions about filters and this is it: just the Circular Polariser. And buy a good one.
People are still sold UV filters to protect their lenses. Hopefully you spent as much as you could afford on a good lens that has coated elements throughout to optimise the image and reduce internal reflections. So why put a cheap bit of plastic (or even more expensive glass) on front and undo all that? Unless there is a real chance that something nasty is going to get on your front element: salt spray, mud, snow – or you are up a proper mountain – use your lens hood to protect your lens.
If you are a serious landscape photographer then you probably should learn to use gradient filters. But for us mere mortals, we shoot RAW and apply a gradient filter in Lightroom.


